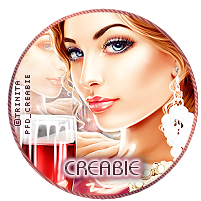
Qui êtes-vous ?

Ma photo
Love make tag and some Psp stuff, learn PS. Feel free to send me your creations with my stuff and tuts.

Grab My Blinkie

Membres


Tube "Enchantress" by ATTILA
and beautiful FTU fan group exclusive kit "For You" by CHAOS PRIESTESS


Miz mask 243 by MIZTEEQUE
Font "Billy Bella"
Filter Eye Candy Impact Gradient Glow
Drop shadow settings : 0.5.30.5
Don't forget to DS each elements.


Open a 800x800 transparent canvas.
Paste paper 02, apply Miz mask 243, merge group, resize 110%.
Paste El 9, position up to the left, duplicate, mirror, flip horizontal.
Paste El 18, position (see my tag as reference)
Paste El 15, resize 40%, position.
Paste Frame 3, object, align, center.

Take your magic wand, select into the frame, expand by 10, paste paper 2 under the frame, invert selection, delete.
Keep selection, paste your close up tube, resize if necessary, delete, deselect.
Change the close up blend mode to overlay..
Paste your main tube, resize 30%, move to the right of the frame.

Paste El 7, resize 50%, position to the left of the frame.
Paste El 5, resize 40%, position.
Paste El 17, resize 50%, position.
Paste El 8, resize 40%, position, duplicate, mirror.
Paste El 12, resize 40%, position.
Paste El 22, resize 60%, position.
Paste Element 1, resize 70%, position.

Text tool, Font Billy Bella, size 48, color white, put your name.
Place to your liking, convert to raster and apply Eye Candy Gradiant Glow , dark color of your tube with this settings :


Apply drop shadow.
Put copyright, crop your tag and save as PNG.
I will happy to see your results, feel free to sent them by mail. I
will show them in a tuts results gallery.

This tutorial was created by Creabie
Any resemblance with another tutorial or tag is purely coincidental

Tube 41-3 by Enys Guerrero at CDO
FTU exclusive fan group kit "Night Walker" by CHAOS PRIESTESS

My wordart
Dropshadow as your liking.
Font use is Beardsons


Open a new canvas 800x800
Paste 14 move a little to the right, select all, float, defloat
Paste your full tube, resize, mirror if needed, invert de selection and delete, deselect.
Change the blend mode to hard light, depends of the tube.
Paste frame 2, move to the left, select inside with your magic wand expand by 5. 
 Paste full tube under the frame and position as your liking in order to see it
 at the left, invert, delete, deselect.
Paste your main tube, resize.
Paste the following elements resize and position (see my tag as reference)
15,17,16,18,6,19,13,20,03,02,11,07,4,12,10,02
Don't forget to dropshadows all elements.
Paste my wordart.

Put your name and copyright.
Crop your tag and save as png.
I will happy to see your results, feel free to sent them by mail. I
will show them in a tuts results gallery.

This tutorial was created by Creabie
Any resemblance with another tutorial or tag is purely coincidental


In this tutorial, i use the "Steam Time" kit
by Bella Caribeña avaliable at 

The tube is "Steampunk 35" 
by Verymany
The tube can be purchase at

You will need mask 0083 by Vivienne

Font of choice

My shadow settings : 0,5,40,10

Open a new transparent canvas 800x800
Paste the mask, resize 85%, selection float, defloat, new raster layer, paste paper 3into selection.
Deselect, delete original black mask layer.
Paste SteamTime mask 2, resize 85%, position on the top left, duplicate, mirror,
position on the right down.

Add the next elements, resize, shadow and position each
Element 71, resize 60%
Element 76, resize 40%
Element 87, resize 30%
Element 86, resize 30%
Element 78, resize 30%
Element 8, resize 60%
Element 132, resize 20%
Element 173, resize 30%
Element 177, resize 30%
Element 158, resize 30%
Element 125, resize 50%
Element 102, resize  30%, rotate left 20°
Element 1, resize 40%
Element 13, resize 60%
Element 165, resize 30%
Element 59, resize 25%
Paste your tube, resize 30%
Element 6, resize 15%
Element 24, resize 50%
Element 42, resize 50% and erase a little the electric wire
Element 89, resize 5%
Element 61, resize 20%
Element 88, resize 11%
Element 134, resize 14%
Element 85, resize 16%
Element 205, resize 9%, position, duplicate and mirror
Element 99, resize 15%
Element 143, resize 15%
Element 167, resize 15%
Element 197, resize 30 %, rotate left 90°

Crop your tag, add name and copyright and save as png.

I will happy to see your results, feel free to sent them by mail. I
will show them in a tuts results gallery.

This tutorial was created by Creabie
Any resemblance with another tutorial or tag is purely coincidental


In this tutorial use a kit "Steam on Valentine" by BELLA CARIBENA


The tube is "Steampunk 76" by VERYMANY

The font is Beardsons

Dropshadow as your liking.


Open white canvas 800 x 800 

Paste mask 3, resize, place up to the left

Paste mask 4, resize, place down to the right

Paste mask 5, resize and place to the middle

Paste element 71, select the interior with your magic wand and expand the selection by 3,

 paste close up tube behind the frame, resize, invert selection and delete, merge down.

Paste the following elements under the frame and resize, use my tag in reference.

Elements 116-34-106-100-52-47-54-128-8-136

Up to the frame, paste the following elements and resize as your liking:

35,98,33,32

Paste the main tube and resize

Paste the last elements and resize each

44,72,109,83,55,13,32,2,57,18,103,97,98,68,112,58,95,117,10,65,43

Put your name and copyright.

Delete the first white layer, crop and save as png.

I will happy to see your results, feel free to sent them by mail. I
will show them in a tuts results gallery.

This tutorial was created by Creabie
Any resemblance with another tutorial or tag is purely coincidental